Home
Home English
 عربى
عربى Español
 русский
 Français
 中文简体
中文简体At 2:00 a.m., the main breaker in a twelve-story office building trips. The corridor lights go dark, the stairwells go dark, and the only thing telling occupants which way to walk is a dim green glow near the elevator lobby. That scenario is exactly what emergency lighting design is meant to solve, and it is why a system that merely meets the minimum code requirements on paper can still fail when people need it most.
Here is the short version: emergency lighting design is a performance specification. You work backward from a 90-minute runtime, a minimum illuminance on the egress path, and an unobstructed line of sight to the exit. Everything else, from fixture type to battery chemistry, follows from those numbers.
What Emergency Lighting Design Must Achieve
Codes such as NFPA 101 (the Life Safety Code), the International Building Code, and local amendments define the minimum. They do not design the system for you; they state what the system must do when normal power fails.
The design targets that matter most are consistent across most jurisdictions:
| Parameter | Common design target | Why it drives the design |
|---|---|---|
| Activation time | 10 seconds or less | People orient faster when evacuation starts |
| Duration | 90 minutes | Assumes evacuation time plus first-responder access |
| Egress path illuminance | 1 fc (10.8 lx) average, 0.1 fc (1 lx) minimum | Enough light to see stairs, doors, and obstacles |
| Exit sign legibility | High contrast, readable from the approach direction | Recognition time is critical under stress |
In practice, most authorities measure illumination along the centerline of the egress path at floor level, and they expect the 90-minute duration to hold when the battery is at the end of its rated life. Designing to the brand-new performance of a battery is a common mistake.
Map the Building and Define the Egress Paths
Before choosing fixtures, mark the egress routes on the floor plan. Start at the exits, then trace the path from every occupied room to each exit. Pay special attention to:
- Stairwells and ramps, which need continuous illumination from top to bottom
- Windowless rooms, storage areas, and high-rack shelving zones
- Open-plan offices where furniture and partitions can block direct light
- High-risk task areas such as kitchens, laboratories, and machine rooms
- Spaces where the exit sign is not directly visible from every point
A practical design process follows these steps:
- Confirm the code edition and any amendments adopted by the authority having jurisdiction
- Trace every egress path and mark the required exit sign locations
- Work from photometric data to set fixture spacing, not from a rule of thumb
- Choose the power source architecture before finalizing the luminaire schedule
- Plan access for monthly and annual testing
Choose the Power Source Architecture
The power source sets the reliability ceiling for the whole system. Most commercial projects use one of three approaches, and the table below summarizes the trade-offs.
| Architecture | Best suited to | Key advantage | Key limitation |
|---|---|---|---|
| Self-contained unit equipment | Small and mid-size buildings, retrofits | No central distribution wiring; each zone operates independently | Battery in every fixture; more maintenance points |
| Central inverter or battery system | Large facilities, high-bay halls, outdoor sites | One battery room; centralized testing and servicing | Higher installed cost; single point of failure |
| Generator with automatic transfer switch | Buildings with an existing standby generator | Long duration and the ability to power non-lighting loads | Power gap during transfer; local emergency luminaires still required |
Self-contained products dominate day-to-day practice because each fixture carries its own battery and charger, so a failure in one zone does not shut down another. If you are retrofitting a luminaire to operate in emergency mode, the differences between emergency ballasts and regular ballasts need to be understood before anything is ordered.
Select Luminaires and Exit Signs by Function
Once the power architecture is settled, fixture selection follows the function of each space. Four product families cover most design situations.
Dual-head and twin-spot units
Dual-head units are the workhorse of emergency lighting. Mounted on walls or columns, they deliver broad directional coverage and are simple to aim. Aim the heads down the egress path rather than at the ceiling, and leave enough adjustment range for future layout changes.
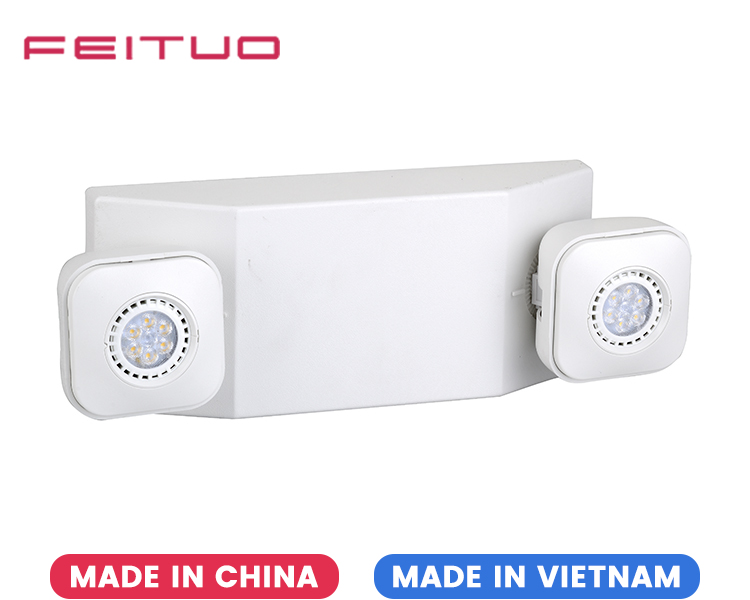 JLEU2 UL Listed Dual-Head LED Emergency Light with Test SwitchThis wall-mounted emergency light offers two adjustable MR-16 heads, a built-in lead-acid battery for 90-minute runtime, and dual 120/277V input, suitable for corridors and moisture-prone areas with IP65-rated outdoor-grade housing.View Product →
Bulkhead and waterproof fixtures
For covered walkways, parking garages, washdown areas, or any location exposed to moisture, an IP65-rated bulkhead fixture is a safer choice than an indoor-only unit. Bulkheads also suit corridors where a low-profile surface-mounted luminaire is preferred over a projecting head unit.
Exit signs and combination units
Exit signs must remain readable from every direction from which a person can approach. Red or green lettering is largely a regional and code preference; what matters is contrast, uniformity, and a clear legend. Combination units, which integrate an exit sign with two LED heads, reduce the number of mounting points and cover small egress areas efficiently.
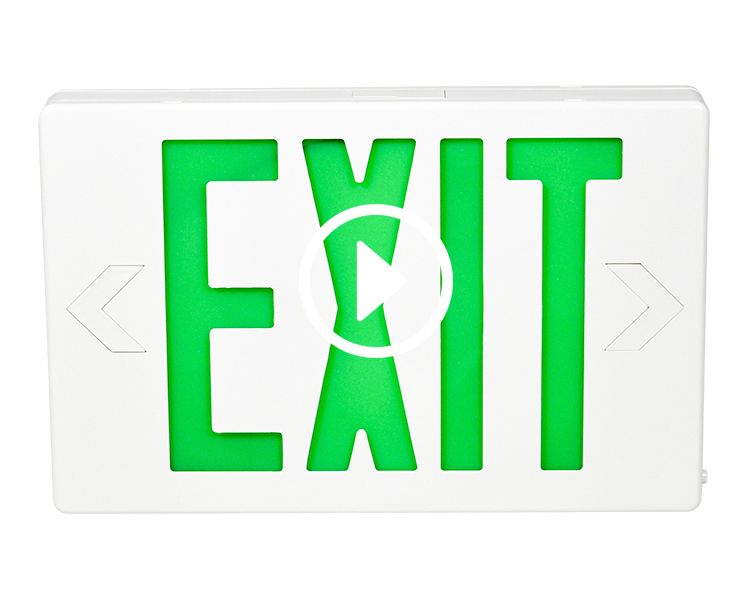 JEE2GWE 6-Inch UL Approved Green LED Exit Sign for Egress PathsA compact green LED exit sign with clear legend and uniform illumination, designed for easy readability from multiple angles. Ideal for combination installations in small egress areas where a single mounting point covers both exit marking and emergency lighting.View Product →
Certification belongs in the same conversation. For North American projects, UL or cUL listed products are usually required; for European markets, CE marking and RoHS compliance are the baseline. A verified supplier's UL compliance certificate can save weeks of review when the submittal package is assembled.
Remote heads and downlights
Remote heads let a single power source feed several lamp heads spread along a corridor or above a suspended ceiling. Emergency downlights fill the same role in architectural spaces where a visible wall unit is not acceptable. Both approaches keep the battery centrally located and serviceable.
Batteries and Drivers Decide Real Reliability
Battery chemistry affects cost, lifetime, and cold-weather behavior more than any other single component. The main options used in emergency luminaires are:
- Nickel-cadmium (NiCd): wide temperature tolerance and long cycle life, but contains cadmium and needs disposal controls.
- Nickel-metal hydride (NiMH): higher energy density than NiCd and cadmium-free; common in compact exit signs.
- Lithium-ion (Li-ion): lightest and smallest for a given runtime; requires charge protection circuitry and careful temperature management.
- Sealed lead-acid: lowest cost per watt-hour, widely used in higher-capacity twin-head fixtures; heavier and more sensitive to repeated deep discharge.
Runtime is battery capacity divided by the connected LED load, minus losses in the charging and switching circuit. Standards require the full 90-minute duration with the battery aged, so size against end-of-life capacity, not the datasheet value of a fresh cell. Drivers and power packs should be UL or CE listed and matched to the specific LED load.
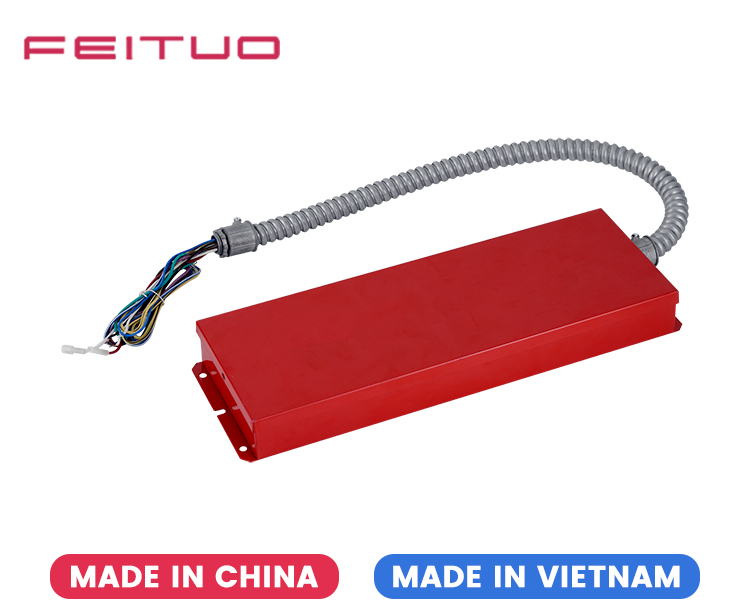 UL and CULus Listed LED Emergency Battery Pack for LED DriversThis emergency battery pack is UL and CULus listed for reliable backup power, connecting to LED loads to supply 90-minute emergency operation. Consider sizing against aged battery capacity and matching to your specific LED driver and circuit requirements.View Product →
Wiring also matters. Emergency circuits should be separate from normal lighting circuits, and the emergency feed should come from the same branch circuit that supplies the general lighting, so any loss of normal power triggers operation.
Design for Testing and Maintenance
NFPA 101 requires functional testing of emergency luminaires: a 30-second test every month and a 90-minute test every year. The design makes those tests either easy or painful.
- Specify self-testing and self-diagnostic fixtures that run the test automatically and report lamp or battery failures.
- Locate test switches and indicator lights where staff can reach them without a ladder.
- Label each fixture with its circuit, installation date, and battery replacement date.
- Replace batteries on a schedule rather than after failure; three to five years is a realistic expectation for most sealed units.
This also influences layout. A fixture above an atrium or over open water is difficult to test and replace; a remote-head setup or a recessed unit with accessible components can be a better trade-off.
Emergency lighting design is rarely the most visible part of a building project, but it is one of the most important. When the egress paths are mapped, the power source is chosen deliberately, and the fixtures match their environment, the code minimum becomes a baseline rather than the final word. The systems that perform best in a real outage are the ones someone can actually test, maintain, and replace without redesigning the building.


 NINGBO FEITUO ELECTRIC APPLIANCE CO., LTD.
 0086-574-87387582
 Website: www.ifeituo.com
 info@ifeituo.com
 Mob/WeChat/WhatsApp: 0086-135-6655-7272